
How to Make your own coconut soap at home is a fun and rewarding experience. It is also a great way to save money and reduce your environmental impact. Coconut soap is naturally antibacterial and moisturizing, making it a great choice for all skin types. Lets Learn How to Make Coconut Soap at Home in 2023.
Table of Contents
What ingredients do I need to make coconut soap?

To make coconut soap at home, you will need the following ingredients:
- Coconut oil
- Water
- Sodium hydroxide (lye)
- Optional: Essential oils, fragrance oils, or colorants
What safety precautions should I take when making coconut soap?
When making coconut soap, it is important to take the following safety precautions:
- Wear safety glasses and gloves. Lye is a caustic substance that can cause serious burns if it comes into contact with your skin or eyes.
- Work in a well-ventilated area. Lye fumes can be irritating to your airways.
- Be careful not to overheat the soap batter. Overheating can cause the soap to discolor or crack.
- Add essential oils or fragrance oils to the soap batter after you have poured it into the mold. Adding them to the hot soap batter can cause them to evaporate.
- Keep soap-making supplies out of reach of children and pets.
Here are some Other safety tips:
- Label all soap-making equipment as “for soap making use only.” This will help to prevent accidental cross-contamination.
- Have a bottle of vinegar on hand in case of lye spills. Vinegar can neutralize the lye and prevent burns.
- Clean up all soap-making supplies thoroughly after use. This will help to prevent accidental contact with lye or other chemicals.
- If you do come into contact with lye, immediately rinse the affected area with water for at least 15 minutes. If the lye is in your eyes, seek medical attention immediately.
By following these safety precautions, you can safely enjoy the process of making your own coconut soap.
What equipment do I need to make coconut soap?
You will also need the following equipment:
- Safety glasses and gloves
- A digital scale
- A large glass or ceramic container
- A whisk or spoon
- A silicone mold
- A sharp knife
What is the basic process for making coconut soap at home?

The basic process for making coconut soap is as follows:
- Gather your ingredients and equipment. You will need coconut oil, water, sodium hydroxide (lye), and a silicone mold. You may also want to add essential oils, fragrance oils, or colorants.
- Prepare your workspace. Make sure your workspace is well-ventilated and that you are wearing safety glasses and gloves.
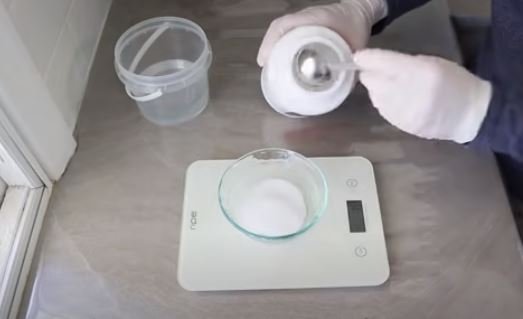
- Weigh your ingredients. Carefully weigh out the coconut oil, water, and sodium hydroxide (lye) according to your recipe.
- Dissolve the sodium hydroxide (lye) in the water. Add the sodium hydroxide (lye) to the water and stir until it is completely dissolved. Be careful not to splash the lye solution, as it can be caustic.
- Add the lye solution to the coconut oil. Once the lye solution has dissolved, slowly add it to the coconut oil and stir until the two ingredients are well combined.
- Pour the soap batter into the mold. Once the soap batter has reached trace (a thick, pudding-like consistency), pour it into the mold.
- Insulate the soap. Cover the mold with a lid or blanket to insulate it and help the saponification process to occur.
- Unmold the soap. After 24-48 hours, the soap should be hard enough to unmold. Use a sharp knife to cut the soap into bars.
- Cure the soap. Let the soap cure for 4-6 weeks before using it. This will allow the soap to harden completely and develop its full lathering potential.
Tips for making coconut soap:
- Use a soap calculator to help you determine the amount of ingredients needed for your recipe.
- Be careful not to overheat the soap batter, as this can cause it to discolor or crack.
- If you are using essential oils or fragrance oils, add them to the soap batter after you have poured it into the mold.
- If you are using a silicone mold, you do not need to line it with parchment paper.
- To cut the soap into even bars, use a sharp knife and a ruler.
- Store the cured soap in a cool, dry place.
How do I scent my Homemade coconut soap?
There are two ways to scent your coconut soap: with essential oils or with fragrance oils.
Essential oils
Essential oils are natural oils that are extracted from plants. They have a variety of therapeutic benefits, and they can also be used to scent soap. However, essential oils are volatile, meaning that they can evaporate easily. This is why it is important to add essential oils to soap after it has reached trace (a thick, pudding-like consistency).
Fragrance oils
Fragrance oils are synthetic oils that are designed to scent soap. They are not volatile, so they will not evaporate as easily as essential oils. This makes them a good choice for soap makers who want to create a soap with a strong, lasting scent.
To scent your coconut soap, simply add a few drops of essential oil or fragrance oil to the soap batter after you have poured it into the mold. The amount of oil you need will vary depending on the strength of the scent you want. A good starting point is to add 10 drops of oil per pound of soap.
You can also combine essential oils and fragrance oils to create your own unique scent. Just be careful not to add too much oil, as this can make your soap soft.
Tips
- Use a high-quality essential oil or fragrance oil. This will help to ensure that your soap has a strong, lasting scent.
- Add the oil to the soap batter after you have poured it into the mold. This will help to prevent the oil from evaporating.
- Start with a small amount of oil and add more to taste.
- You can combine essential oils and fragrance oils to create your own unique scent.
- With a little practice, you’ll be able to create coconut soap with a scent that you love!
How do I color my coconut soap?
To color your coconut soap, you can use either soap dye or natural colorants. Soap dye is a synthetic pigment that is specifically designed for coloring soap. It is available in a wide variety of colors, so you can create any look you want.
Natural colorants are made from plants, minerals, and other natural ingredients. They are not as vibrant as soap dye, but they can still be used to create beautiful and unique soap. Some popular natural colorants include:
- Turmeric: yellow
- Annato: orange
- Alkanet root: red
- Madder root: pink
- Indigo: blue
- Spirulina: green
- Activated charcoal: black
To color your coconut soap with soap dye, simply add a few drops of dye to the soap batter after you have poured it into the mold. The amount of dye you need will vary depending on the intensity of the color you want. A good starting point is to add 1 drop of dye per pound of soap.
To color your coconut soap with natural colorants, you will need to make a tea or infusion. To do this, simply add the colorant to a cup of boiling water and let it steep for 15-30 minutes. Once the tea or infusion has cooled, add it to the soap batter after you have poured it into the mold.
Tips
- Use a high-quality soap dye or natural colorant. This will help to ensure that your soap has a vibrant and lasting color.
- Add the color to the soap batter after you have poured it into the mold. This will help to prevent the color from fading.
- Start with a small amount of color and add more to taste.
- You can combine different colors of soap dye or natural colorants to create your own unique colors.
- With a little practice, you’ll be able to create coconut soap with beautiful and unique colors!
How do I cure my coconut soap?
Curing is the process of allowing the soap to harden completely and develop its full lathering potential. During the curing process, the water in the soap evaporates, and the soap hardens. The lye also reacts with the oils in the soap to create a salt called sodium stearate, which is responsible for the soap’s lather.
To cure coconut soap, simply place it in a cool, dry place for 4-6 weeks. You can wrap the soap in plastic wrap or store it in a cardboard box. Avoid storing the soap in direct sunlight, as this can cause it to discolor.
Once the soap has cured, it is ready to use!
Here are some additional tips for curing coconut soap:
- Cut the soap into bars before curing. This will help the soap to cure evenly.
- Place the soap bars on a wire rack to allow air to circulate around them.
- Do not stack the soap bars on top of each other, as this can prevent them from curing evenly.
- If you are using essential oils in your soap, allow the soap to cure for at least 6 weeks to allow the essential oils to fully integrate with the soap.
With a little patience, your coconut soap will be cured and ready to use in no time!
How do I know when my coconut soap is ready to use?
Your coconut soap is ready to use when it is hard, dry, and has a pH of 7-9. Here are some tips on how to test your soap:
Hardness: Press down on the soap with your finger. If the soap is hard and does not leave a dent, it is cured.
Dryness: Cut a small piece of soap and let it sit for a few hours. If the soap does not become soft or sticky, it is cured.
pH: You can purchase a pH test kit at most drugstores. To test the pH of your soap, simply dissolve a small piece of soap in water and test the solution with the pH test kit.
If your soap is not hard, dry, or has a pH outside of the 7-9 range, it is not cured and should not be used.
Tips
- Test the soap in a few different places to ensure that it is cured evenly.
- If you are using essential oils in your soap, wait at least 6 weeks before testing the pH, as the essential oils can affect the pH of the soap.
- If your soap is not cured after 6 weeks, you may need to rebatch it.
- Once your soap is cured, you can enjoy it for months to come!
How do I store my coconut soap?
tips on how to store your coconut soap:
- Keep the soap in a cool, dry place. Avoid storing the soap in direct sunlight, as this can cause it to discolor.
- Do not store the soap in the shower or bathtub, as the humidity can cause it to soften and become mushy.
- If you are storing multiple bars of soap, keep them separate to allow air to circulate around them.
- You can store the soap in plastic wrap or a cardboard box.
- If you are using essential oils in your soap, wrapping the soap in plastic wrap will help to preserve the scent.
Coconut soap can be stored for up to a year. However, it is important to check the soap regularly to make sure that it is still hard and dry. If the soap begins to soften or become moldy, it should be discarded.
Enjoy your homemade coconut soap!
What are some tips for making coconut soap?
tips for making coconut soap:
- Use high-quality ingredients. This will help to ensure that your soap has a strong, lasting scent and a good lather.
- Be careful not to overheat the soap batter. Overheating can cause the soap to discolor or crack.
- If you are using essential oils, add them to the soap batter after it has reached trace (a thick, pudding-like consistency). This will help to prevent the essential oils from evaporating.
- If you are using a silicone mold, you do not need to line it with parchment paper.
- To cut the soap into even bars, use a sharp knife and a ruler.
- Store the cured soap in a cool, dry place.
Use a soap calculator to help you determine the amount of ingredients needed for your recipe. This will help to ensure that your soap is balanced and safe to use. .
If you are new to soap making, it is a good idea to start with a simple recipe. There are many recipes available online and in soap making books.
Be patient and have fun! Soap making is a rewarding process, and it takes time and practice to master.
If you have any How to Make Coconut Soap at Home questions or problems, there are many online forums and communities where you can get help from other soap makers.


